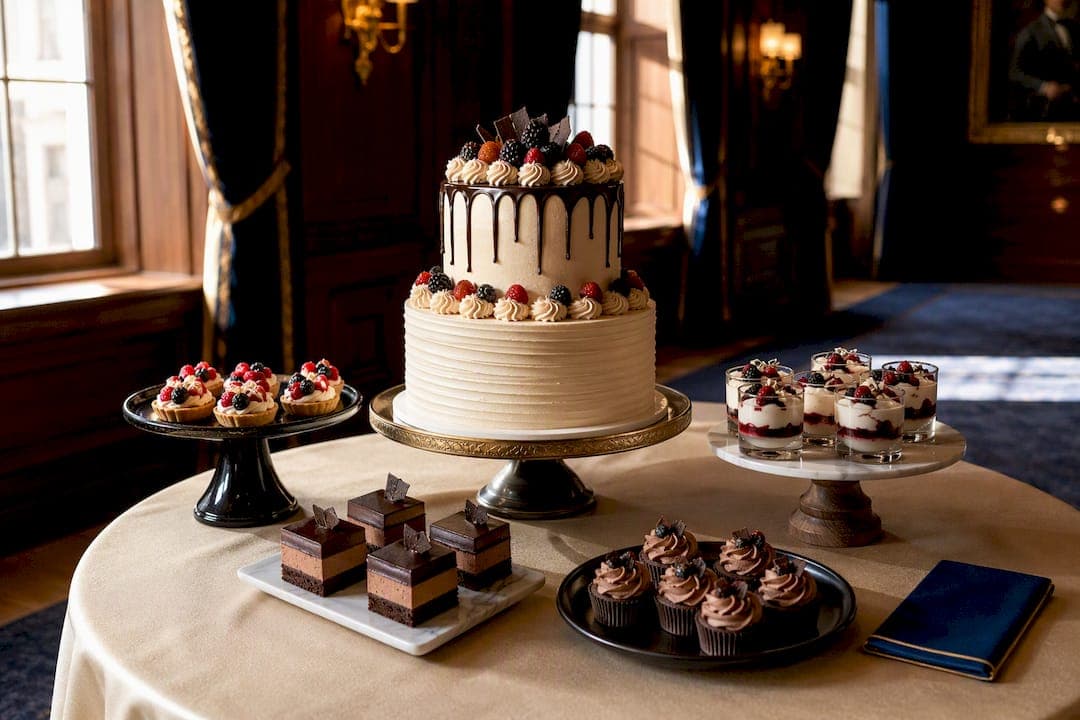
The easiest dessert table follows one formula: pick a showpiece, add three to five supporting items, vary the heights, and set out chilled or perishable treats last. Mix a few thrifted stands with one or two store-bought pieces to save both time and money without the table looking sparse or mismatched.
TL;DR:
- A dessert table should feature one showpiece and three to five supporting items, with contrast in textures and flavors to keep it visually appealing.
- Using thrifted furniture, crates, or repurposed items can create an intentional, budget-friendly display without purchasing expensive stands.
- Proper layout involves strategic arrangement, logical guest flow, and placement away from heat sources to maintain dessert freshness.
- Quantities should range from 8 to 10 pieces per guest for support stations or 12 to 15 if replacing a cake, with a 15% buffer for additional servings.
- Ensuring cold desserts stay below 41°F and monitoring temperature regularly are essential for food safety during outdoor or warm events.
Table of Contents
- Key elements every dessert table needs
- Budget-friendly idea blocks and DIY swaps
- Layout, flow, and guest access
- Portions and quantities: how many pieces per guest
- Food safety and temperature control for perishable desserts
- Styling and display tips that make simple desserts look curated
- Venue-host practical checklist and day-of run sheet
- Why simpler, venue-tested displays work best
- Let The Ambassador Club handle the setup for you
- Sources
- FAQ
Key elements every dessert table needs
Before you arrange anything, gather the pieces that make a dessert table function and photograph well. Your showpiece anchors the whole display: a tiered cake for a wedding, a giant cookie or number-shaped cake for a birthday, or a donut wall for a casual party. Everything else supports it.
Around that centerpiece, a small, varied supporting mix reads as generous without looking overstuffed. Aim for contrast: something crunchy next to something soft, chocolate next to fruit, a bite-sized option next to something you cut and serve. Include at least one nut-free or gluten-free item, clearly marked, so no guest is left out.
Then round up the practical gear that keeps things running smoothly:
- Tongs, small forks, or mini spoons for each dessert type, so flavors do not mix.
- Plates and napkins stacked at one end, not scattered across the table.
- A small waste bin or discreet tray nearby for wrappers and used utensils.
- Handwritten or printed labels naming each dessert and flagging allergens.
- A tablecloth or runner that matches your color scheme and hides folding-table legs.
Skipping any one of these turns a pretty display into a logistical headache halfway through the party.
Budget-friendly idea blocks and DIY swaps
You do not need a rental company to build a display that looks intentional. A repurposed dresser or cabinet makes an interesting dessert display and usually costs nothing if you already own one or can borrow it, cutting down on the cake stands you would otherwise need to buy.
Try these low-cost setups, most of which use items you can find secondhand or already have at home:
- Stack thrifted books or wooden crates to build a riser tower for cupcakes.
- Layer mason jars with pudding or trifle for grab-and-go parfaits.
- Build a dowel stand for donuts using a wood base and a few painted dowels.
- Fill paper cones with popcorn or candied nuts for a textured, low-mess option.
- Line up mini jars with individual portions of cheesecake or fruit crumble.
- Use a vintage tray or cutting board as a base for cookies or bars.
- Turn a ladder into a tiered display by leaning it against a wall.
- Repurpose glass candlesticks as instant cake stands for cupcakes or macarons.
- Set out a candy scoop station with jars from a dollar store and small paper bags.
- Use a muffin tin, painted or wrapped in ribbon, to display individually portioned sweets.
- Group mismatched thrifted plates by color for a curated, collected look.
- Add a small chalkboard sign or printable label sheet to tie the whole table together.
Dollar stores, thrift shops, and your own kitchen cabinets cover most of this list. Print labels on cardstock at home, or cut simple shapes from kraft paper for a rustic backdrop behind the table.
Pro Tip: Buy one or two matching cake stands new, then thrift everything else in similar colors or materials so the mismatch reads as styled, not accidental.

Layout, flow, and guest access
How you arrange the table matters as much as what is on it. Symmetrical layouts work best for large crowds because they are easy to scan quickly, while asymmetrical arrangements suit smaller, more relaxed gatherings where guests browse instead of queue.
Think about how people will actually move around the table:
- Set up a one-way flow for tight spaces, plates at the start, desserts in the middle, napkins at the end.
- Use double-ended access for larger groups so two guests can serve themselves at once without crowding.
- Keep the table out of direct sun or near heating vents, especially for anything with frosting or chocolate.
- Leave a few inches of open space near each dessert for guests to set down a plate while serving themselves.
- Place the table away from the bar or main walkway to avoid bottlenecks during peak mingling times.
A table that looks beautiful but forces a single-file line for twenty minutes will frustrate more guests than it delights.
Portions and quantities: how many pieces per guest
The right quantity depends on whether desserts replace the cake or supplement it. For a supplementary dessert station, plan on 8 to 10 pieces per guest; if the dessert table is standing in for a traditional cake, plan for 12 to 15 pieces per guest, then add a 15% buffer for seconds and uneven serving.
| Table type | Pieces per guest | Suggested buffer |
|---|---|---|
| Supplementary dessert station | 8 to 10 | 15% |
| Dessert table replacing cake | 12 to 15 | 15% |
Pre-portioned jars and small tongs naturally control serving size better than a single large tray, and labels help guests choose without hovering and picking through several options.
Food safety and temperature control for perishable desserts
Perishable desserts need the same care as any other food at a party. FSIS guidance sets cold items at or below 40 to 41°F and hot items at or above 135 to 140°F, with cold desserts kept on drained ice that gets replaced as it melts.
Cold desserts held above 41°F for too long move into the temperature range where bacteria multiply fastest, according to FSIS, which is why timing and monitoring matter as much as the display itself.
- Keep custards, cream-filled pastries, and dairy-based desserts chilled until just before guests arrive.
- Use drained ice baths under bowls or platters and swap the ice out regularly in warm weather.
- Store backup trays in a refrigerator and rotate them out instead of refilling from room-temperature stock.
- Avoid leaving cream-based items out for extended stretches during outdoor or hot-weather events.
- Assign one person to check the table every 30 to 45 minutes for restocking and temperature issues.
Styling and display tips that make simple desserts look curated
A repeated color palette does more visual work than any single expensive prop. Stick to two or three colors across your linens, ribbons, and dessert wrappers, and mix materials like glass, wood, and ceramic so the table has texture instead of looking flat.
- Group desserts in odd numbers (three or five) rather than even pairs for a more natural look.
- Vary height with books, crates, or stands so the table has a front-to-back rhythm.
- Fill gaps with fresh flowers, greenery, or wrapped candy instead of leaving empty plate space.
- Add warm string lights or a few candles nearby to soften harsh overhead lighting.
- Keep labels short and legible, one dessert name and any allergen note, nothing longer.
For more visual reference, food presentation examples can help you settle on a palette before you start shopping for props.
Pro Tip: Photograph your table setup on your phone before guests arrive. Flat lighting or awkward gaps show up in photos long before they show up to the eye in person.
Venue-host practical checklist and day-of run sheet
At The Ambassador Club, we have watched enough dessert tables come together to know the schedule matters more than the styling. Set decor, stands, and labels the day before. Save perishable items, ice, and anything cream-based for the morning of or within an hour of guests arriving.
- Assign one person, not the host, to restock and monitor the table throughout the event.
- Confirm refrigerator space and bussing responsibilities with your caterer or venue ahead of time.
- Walk the layout once with your server or point person so everyone knows the restock cadence.
Why simpler, venue-tested displays work best
Hosting hundreds of events taught our team that freshness and staffing beat elaborate styling every time. A table with two strong focal tricks and a reliable restock plan outperforms a Pinterest-perfect setup nobody is watching.
— MARTIN
Let The Ambassador Club handle the setup for you
If you would rather skip the ice baths and restock schedule, The Ambassador Club's Standard Event Package includes a full commercial kitchen, giving your caterer real refrigeration and prep space instead of a folding table and a cooler.

Our event services, including Elegant Wedding Receptions, Birthday Party Venue, and Anniversary Celebrations, come with setup support so your dessert table gets built and monitored without pulling a guest away from the party. Check our booking and fee details to see what is included, or get in touch to check availability for your date.
Sources
- FSIS | Steps to keep food safe
- Brides — wedding dessert bar ideas
- Plan A Wedding — Wedding candy & dessert bar guide
- Party Ideas by a Pro — dessert table layout
FAQ
How many items should be on a dessert table?
A focused table works best with one showpiece plus three to five supporting desserts for smaller events. Larger dessert bars can stretch to 8 to 12 different items without feeling cluttered.
How much does a dessert table cost for 100 people?
Cost depends heavily on whether you DIY with thrifted props and homemade desserts or hire a full-service caterer, so there is no single fixed price. Budget-conscious hosts can cut costs significantly by repurposing furniture and buying only a few new stands, while catered buffet packages add staffing and equipment costs on top of the desserts themselves.
What do you put on a dessert table?
A dessert table typically includes one showpiece dessert alongside a mix of textures and flavors, such as cookies, cupcakes, and a fruit-based option, plus at least one allergy-friendly choice. Round it out with serving tools, labels, plates, and napkins so guests can serve themselves easily.
How much should I charge to set up a dessert table?
Pricing for dessert table setup services varies by region, scale, and whether staffing or catering is included, and no single standard rate applies across the industry. Anyone offering this as a service should factor in prop costs, setup and breakdown time, and any restocking duties during the event.