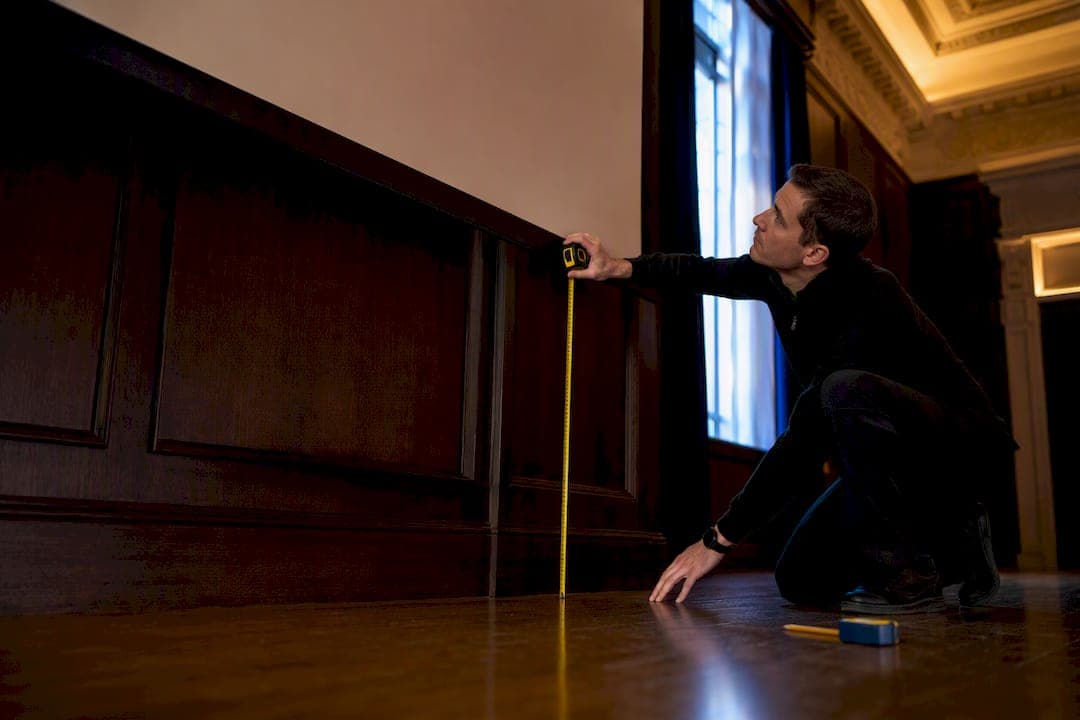
The bottom of your projector screen should sit about 24 to 40 inches off the floor for a seated audience, following the industry's lower one-third rule: your eyes, seated, should land roughly one-third of the way up the image. Get that number right first, then match the projector's throw ratio and lens shift to it before you drill a single hole.
TL;DR:
- Mount the screen so a seated viewer's eye level hits about one-third up the image, typically between 24 and 40 inches from the floor, for optimal comfort.
- Calculate your projector’s placement using its throw ratio and preferred zoom range to ensure proper distance, generally around 10 to 15 feet for standard room sizes.
- Choose a projector with lens shift capabilities and mount it accordingly, avoiding heavy reliance on digital keystone to maintain image sharpness.
- When seating multiple rows, increase the bottom-of-screen height to 40 to 48 inches to maintain clear sightlines over the front seats.
- Verify your room's light conditions and select the appropriate screen material, with ALR screens suited for bright environments and matte white for dark, controlled rooms.
Table of Contents
- Projector Screen Placement: Setting Height With the Lower One-Third Rule
- Calculating Viewing Distance and Screen Size for Your Room
- Projector Height, Lens Shift, and Avoiding Keystone Distortion
- When Multiple Rows of Seating Change the Math
- Choosing Screen Material for Your Room's Light Conditions
- Step-by-Step Installation Checklist Before You Drill
- What Event Venues Know About AV Placement That Homeowners Miss
- Cable Management and Power Source Proximity During Placement
- Safety and Accessibility Considerations for Installed Screens
- Three Rules to Remember When Placing Screens and Projectors
- Sources
- FAQ
Projector Screen Placement: Setting Height With the Lower One-Third Rule
Your eyes are the reference point, not the screen. Mount the screen so a seated viewer's eye level hits about a third of the way up the image, and the picture reads naturally without tilting your head back or straining your neck through a two-hour movie. Go too high and everyone cranes upward. Go too low and the bottom third disappears behind heads or furniture.
Most seated adults have an eye level between 42 and 48 inches off the floor. Run that through the one-third rule and you land on a bottom-of-screen height between 24 and 40 inches, depending on chair height, riser use, and how far back the seating sits. Industry AV professionals treat this as a comfort issue as much as a picture-quality one. A gorgeous 4K image mounted wrong still gives you a sore neck.
Here's how that plays out on a common setup:
- A 100-inch diagonal 16:9 screen has an image height that can be roughly estimated based on the aspect ratio. Mounting the bottom edge at a comfortable height allows a viewer's seated eye level to align about one-third up the image, optimizing viewing comfort.
Before you commit to a height, measure your actual seated eye level in the chair you'll actually use, not a guess. Then run painter's tape across the wall to outline the screen's exact footprint. Sit in every seat, front row to back, and look at the taped outline for a few minutes before you touch a drill.
Calculating Viewing Distance and Screen Size for Your Room
Throw ratio tells you how far the projector needs to sit from the screen for a given image width, and it's the number that decides whether your setup even fits your room. The formula is simple: throw distance = throw ratio × screen width.
Projectors fall into three rough categories:
- Ultra-short-throw: roughly 0 to 4 feet from the screen, often sitting on a low shelf right beneath it.
- Short-throw: about 3 to 8 feet, useful for smaller rooms where a rear mount isn't possible.
- Standard throw: typically 1.3 to 1.7 times the screen width, which for a 100-inch-wide screen means somewhere around 10 to 12 feet back.
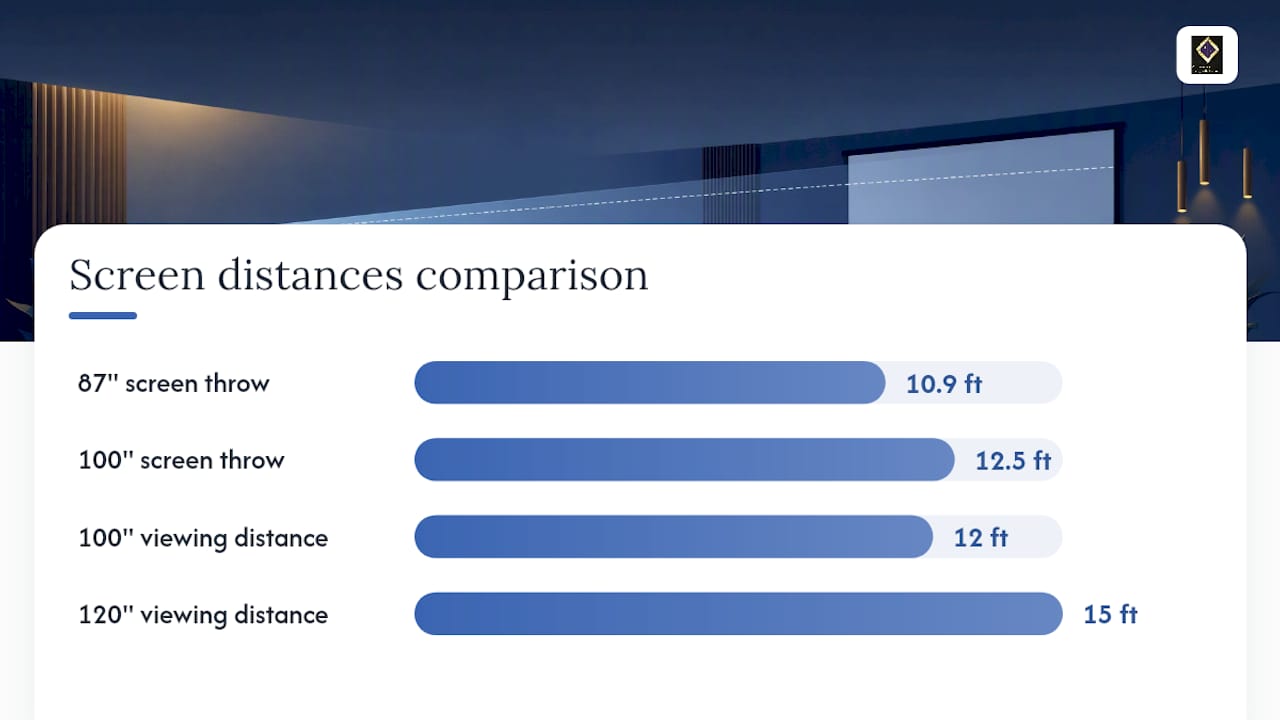
A quick worked example: an 87-inch-wide screen with a 1.5 throw ratio needs the projector positioned about 130.5 inches away, or roughly 10.9 feet. Scale that up to a 100-inch-wide screen at the same ratio and you're looking at closer to 12.5 feet.
For viewing distance, a common guideline is to position seating at a distance roughly three times the screen height, which balances immersion and comfort. A 100-inch diagonal screen (roughly 49 inches tall) plays best from around 12 feet back. Bump up to a 120-inch screen (about 59 inches tall) and the sweet spot moves closer to 15 feet. Check your specific event lumen and screen-size math if you're scaling a room for a larger group rather than a single couch.
Don't ignore zoom range. Most projectors have some flexibility built into the lens, letting you shift a foot or two closer or farther without losing focus. Pushing the projector to the limits of its zoom range can reduce image quality and brightness, so it's better to position it within the optimal zoom range when possible.
Projector Height, Lens Shift, and Avoiding Keystone Distortion
Where you mount the screen only tells half the story. The projector's own optics decide whether that placement actually works cleanly.
Three mechanisms control vertical image alignment, and they are not interchangeable:
- Lens shift physically moves the internal lens up, down, left, or right without distorting the image. This is the feature you want if you have any flexibility in your budget.
- Fixed offset locks the lens position relative to the image at a set percentage, which forces you to place the projector at a very specific height with no room to adjust.
- Digital keystone electronically stretches the image to correct for misalignment, but it does so at the cost of sharpness and uniform brightness across the frame.
Mounting rules follow directly from which of those three your projector has. Ceiling-mounted units with generous lens shift usually work best with the lens positioned near the top edge of the screen, since shift lets you nudge the image down into place. Ceiling mounts without shift need the lens aligned almost exactly with the top of the screen, because there's no room to correct afterward. Shelf or table mounts, by contrast, typically place the lens near the bottom edge and throw the image upward.
Practical trade-offs matter here too. Ceiling mounts keep the projector, fan noise, and cabling out of the walking path, but they're more permanent and harder to adjust once installed. Shelf mounts are easier to tweak and service, but they put the unit in the room's traffic flow and can throw a shadow if anyone stands up mid-movie.
Pro Tip: Keep lens shift under about 50 percent of its total range whenever possible. Pushing it to the max on both axes at once tends to cause soft corners or vignetting, even on otherwise sharp projectors.
Minimize digital keystone entirely if you can. It's a fallback for a mount you can't reposition, not a first-choice tool.
When Multiple Rows of Seating Change the Math
A single-row home theater and a multi-row media room need different screen heights, and treating them the same is one of the most common setup mistakes. Single-row seating favors the lower end of the range, generally 24 to 34 inches off the floor, because there's nothing behind the front row to worry about.
Add a second or third row and the calculation shifts. Rear viewers need a clear sightline over the heads in front of them, which usually means raising the bottom edge to somewhere in the 40 to 48 inch range, depending on riser height and row spacing.
A few checks before you commit to a height:
- Sit in the back row and see if the bottom third of a taped-out screen outline is blocked by heads in front.
- If you're using stadium risers, factor the riser height directly into your bottom-edge calculation.
- Compare against venue and banquet-hall practice, where AV teams often mount screens higher specifically to protect back-row sightlines, following principles described in this venue entertainment program guide. That same logic scales down to a home theater with three or four rows of seating. For more on how seating layout interacts with screen sizing, see this breakdown of conference versus banquet seating.
Choosing Screen Material for Your Room's Light Conditions
Screen material and screen placement aren't separate decisions. They affect each other. A fully light-controlled room, blackout curtains, no windows, dim wall colors, does fine with a standard matte white screen, which reflects light evenly and forgives minor placement quirks.
A room with persistent ambient light, a media room with windows or overhead lighting you can't fully kill, is a different problem. That's where ambient light rejecting (ALR) screens earn their keep. ALR material is engineered to reject off-axis light while reflecting the projector's beam more directly back toward the seating area, which preserves contrast that a matte white screen would lose to glare.
The catch: ALR screens are angle-sensitive. Mount one too high, too low, or off-center from your seating, and you lose a chunk of the benefit you paid extra for. Placement precision matters more with ALR than with matte white.
- Keep the screen out of direct line-of-sight from windows or bright fixtures.
- Avoid placing it where foot traffic crosses between a light source and the screen.
- If you're going ALR, get the height and centerline right on the first try. This is not a material that forgives sloppy mounting.
Pro Tip: Test your ambient light conditions at the time of day you'll actually watch, not midday. A room that looks fine at noon can wash out badly under evening lamplight.
Step-by-Step Installation Checklist Before You Drill
Measuring twice and drilling once isn't just an old saying here. It's the difference between a clean install and a wall full of patched holes.
- Measure viewer eye height in your actual seating, then mark the one-third boundary on the wall with painter's tape. This is your target for the bottom of the screen.
- Calculate throw distance from your projector's documented throw ratio and screen width, then mark the projector's intended location, whether that's a ceiling point or a shelf.
- Test before you commit. Set the projector temporarily at that marked spot, power it on, and use zoom and lens shift to align the image against your taped outline. Testing the geometry before final mounting catches problems while they're still cheap to fix.
- Mount for real once the geometry checks out. Anchor the screen bracket into studs or use rated anchors for drywall-only spots, run cable through code-compliant conduit or CL2/CL3-rated cable for any in-wall HDMI runs, and do a final check from the farthest seat in the room.
Quick pre-drill checklist:
- Eye-level tape line marked and confirmed from every seat
- Throw distance measured and matched to projector zoom range
- Temporary power-on test completed with lens shift dialed in
- Cable path confirmed and rated for in-wall use
- Final image verified from the back row, not just the couch closest to the wall
What Event Venues Know About AV Placement That Homeowners Miss
Running AV for events since 1933 teaches a venue a few things homeowners rarely think about: audience-first layout and back-of-room verification. At a professional venue, nobody signs off on a screen or projector setup until someone has walked to the farthest seat in the room and checked the sightline from there, not just from the sweet spot near the front.
That same discipline translates directly to a living room. If you've only ever tested your projector from the couch, you've tested one seat, not the whole room. Borrow the venue habit: check every seat, including the one in the corner nobody wants.
Ambassadorclubportsmouth's own AV checklist for signal flow and venue handoff covers a lot of the same ground homeowners face, cable routing, testing before final setup, and confirming sightlines. It's worth a look even if you're planning a media room, not a wedding reception.
Cable Management and Power Source Proximity During Placement
Screen and projector placement decisions get complicated fast once you factor in where the power actually comes from. A ceiling-mounted projector fifteen feet from the nearest outlet is a real problem if you didn't plan for it before drilling.
Map your outlets before you finalize a mount location, not after. Ceiling mounts almost always need either a dedicated outlet run installed by an electrician or a long, properly rated extension routed through conduit, never a bare cord draped across a ceiling. Shelf and table mounts are easier here since they usually sit closer to existing wall outlets, but check that the cord path doesn't cross a walkway.
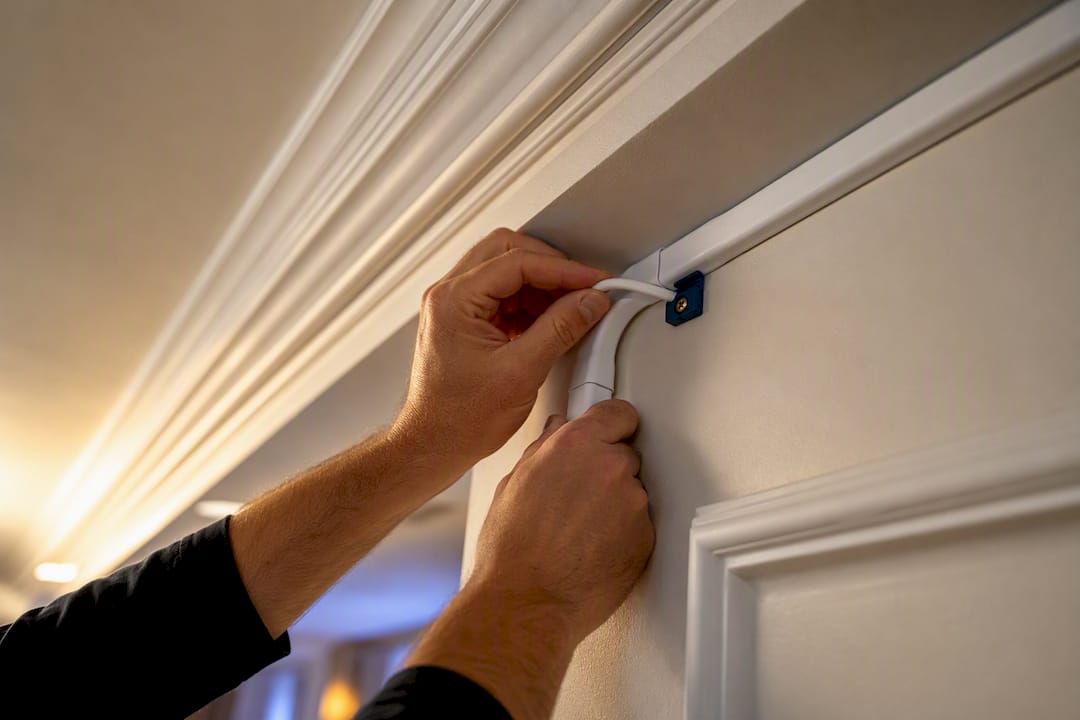
For signal cable, HDMI runs longer than about 25 feet start to risk signal degradation unless you're using an active or fiber-based cable rated for distance. If you're routing HDMI through a wall, use CL2 or CL3 rated cable to stay code-compliant, and pull a string through the conduit while you have access, so a future upgrade doesn't mean cutting into drywall again.
A few habits save real headaches later:
- Label both ends of every cable before you route it, especially in a ceiling install where you can't see the far end once it's up.
- Leave a service loop of extra cable length at both the projector and the wall plate.
- Keep power and signal cables separated where possible to reduce interference, particularly with longer HDMI runs.
Plan the power and cable path at the same time you plan the height and throw distance. Retrofitting an outlet after the screen's already on the wall is expensive and avoidable.
Safety and Accessibility Considerations for Installed Screens
A projector screen and mount are heavy, elevated, and usually anchored above head height, which means installation mistakes carry real consequences beyond a crooked picture.
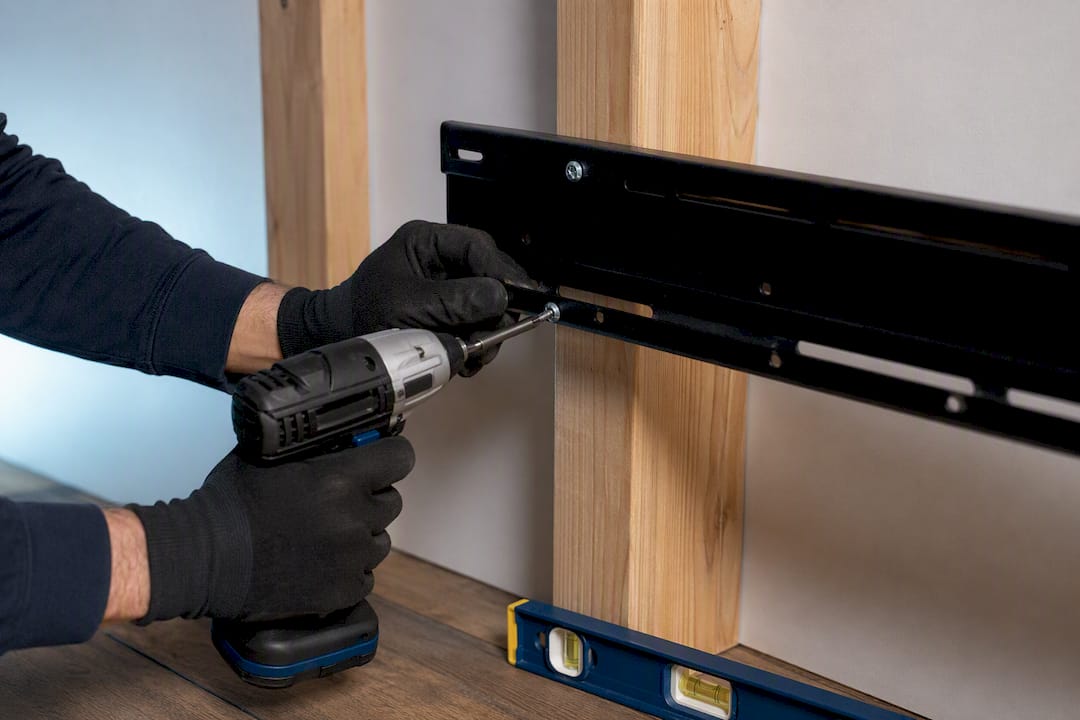
Anchor into studs whenever the screen or mount weight allows it. Drywall anchors rated for the specific weight of your screen and bracket work for lighter units, but a large motorized screen or a ceiling-mounted projector bracket needs a stud or a dedicated backing board installed behind the drywall. Check the manufacturer's weight rating before you assume any anchor will hold.
Ceiling-mounted projectors need enough clearance that nobody standing up mid-movie hits their head, and enough setback from doorways that the mount isn't the first thing someone walks into in a dark room. If you've got kids, a motorized screen's descent path should be checked for anything that could get caught or pinched as it lowers.
Accessibility matters too, especially in a shared or multi-generational household. If anyone in the home uses a wheelchair or has limited mobility, sightline testing needs to happen from that seated height specifically, not just from a standard chair. The one-third eye-level rule assumes a typical seated eye height between 42 and 48 inches; a wheelchair user's eye level may sit lower, which shifts the ideal bottom-of-screen height down as well.
Finally, keep any exposed cable runs off the floor and out of walkways. A cable strung across a room, even briefly during setup, is a trip hazard that's easy to prevent with basic cable clips or a raceway.
Three Rules to Remember When Placing Screens and Projectors
Strip away the math and the mounting options, and three rules do most of the work. First, align the viewer's eye at roughly one-third up the screen. That single number drives almost every other decision. Second, confirm the projector's throw ratio and lens shift capability before any hardware goes on the wall. Third, test from the farthest seat with the projector temporarily placed before you drill anything permanent.
Skip any one of these and you'll likely redo part of the install later.
— MARTIN
Sources
These are the primary references behind the height and throw-distance guidance in this article:
- How to Find the Ideal Height for a Projector Screen - CEPRO
- Projector Placement Guide: Mounting, Distance & Setup | TheaterCalc
- The “Sweet Spot” with Sable Frame CineGrey® 3D – Projection Screen Resource
- Projector screen setup and mounting best practices - Audioholics
- What is the best height for a projector screen from the floor? - Samsav
FAQ
What Is the 4-6-8 Rule for Projectors?
A common guideline suggests seating at roughly three times the screen height to balance immersion and comfort, varying depending on screen resolution and content to keep detail sharp without seeing pixel structure.
How High Should a 120-Inch Screen Be From the Floor?
A 120-inch screen follows the same lower one-third rule as any other size: mount the bottom edge between 24 and 40 inches off the floor for single-row seating, or closer to 40 to 48 inches if you have multiple rows.
How High Should a Projector Screen Be Mounted?
Most seated adults have eye levels between 42 and 48 inches, which puts the ideal bottom-of-screen height between 24 and 40 inches from the floor for single-row viewing.
How Far Should a Projector Be From the Wall?
That depends entirely on the projector's throw ratio and your screen width. Multiply the throw ratio by the screen width to get the distance; a standard-throw unit at a 1.5 ratio on a 100-inch-wide screen needs roughly 12.5 feet of distance.
Should I Use Lens Shift or Digital Keystone to Correct the Image?
Lens shift is almost always the better choice because it repositions the image optically without any loss of sharpness, while digital keystone stretches the image electronically and softens picture quality in the process.